How does the bitcoin source code define its 21 million cap?
Many of bitcoin’s staunchest critics have expressed doubt about its 21 million cap, but perhaps the most mindless criticism relates…
,
First published: 12/19/2022
| Last
updated: 01/18/2023
| -- min read
There are many ways that you can use bitcoin multisig for escrow. Here we look at how to set up a basic multisig wallet using Caravan to facilitate a bitcoin multisig escrow arrangement. This arrangement is most useful for coordinating a bitcoin transaction over the internet in exchange for goods between two counterparties with the help of a trusted intermediary.
We’ll be creating a 2-of-3 multisig wallet in our example here. Before heading over to Caravan, you will need to ensure you have the necessary items.
You’ll need:
note: Caravan technically supports Hermit and manually uploading xpubs from any bitcoin wallet, but these are more advanced workflows and we assume you will use hardware wallets for the purposes of this guide.
The first step for setting up the multisig escrow wallet is for each participant in the multisig escrow (both counterparties and the intermediary) to create and secure their own key. All three participants must initialize and properly back up their key using the first-party hardware wallet software or on the device itself.
Natively, Caravan only supports Trezor, Ledger, and Coldcard, and you can find software and documentation at their respective sites: Trezor Suite, Ledger Live, Coldcard.
After initialization, each participant should ensure that their hardware wallet is initialized properly. For this, they could individually perform test transactions by having one of the other participants send a small amount of bitcoin to the address generated by the wallet. Each could then confirm they can spend it.
Before proceeding, all three participants should have a proper seed phrase backup on paper or metal. It’s critically important that no participant shares this secret information with any other participant. This ensures that no one party has control over a majority of keys in the multisig escrow wallet, allowing them to spend funds without the authorization of other parties.
Once your three hardware wallets are initialized and seed phrases as properly secure, visit the Caravan website hosted at GitHub to get started setting up the multisig wallet.
 Importing keys for your multisig wallet
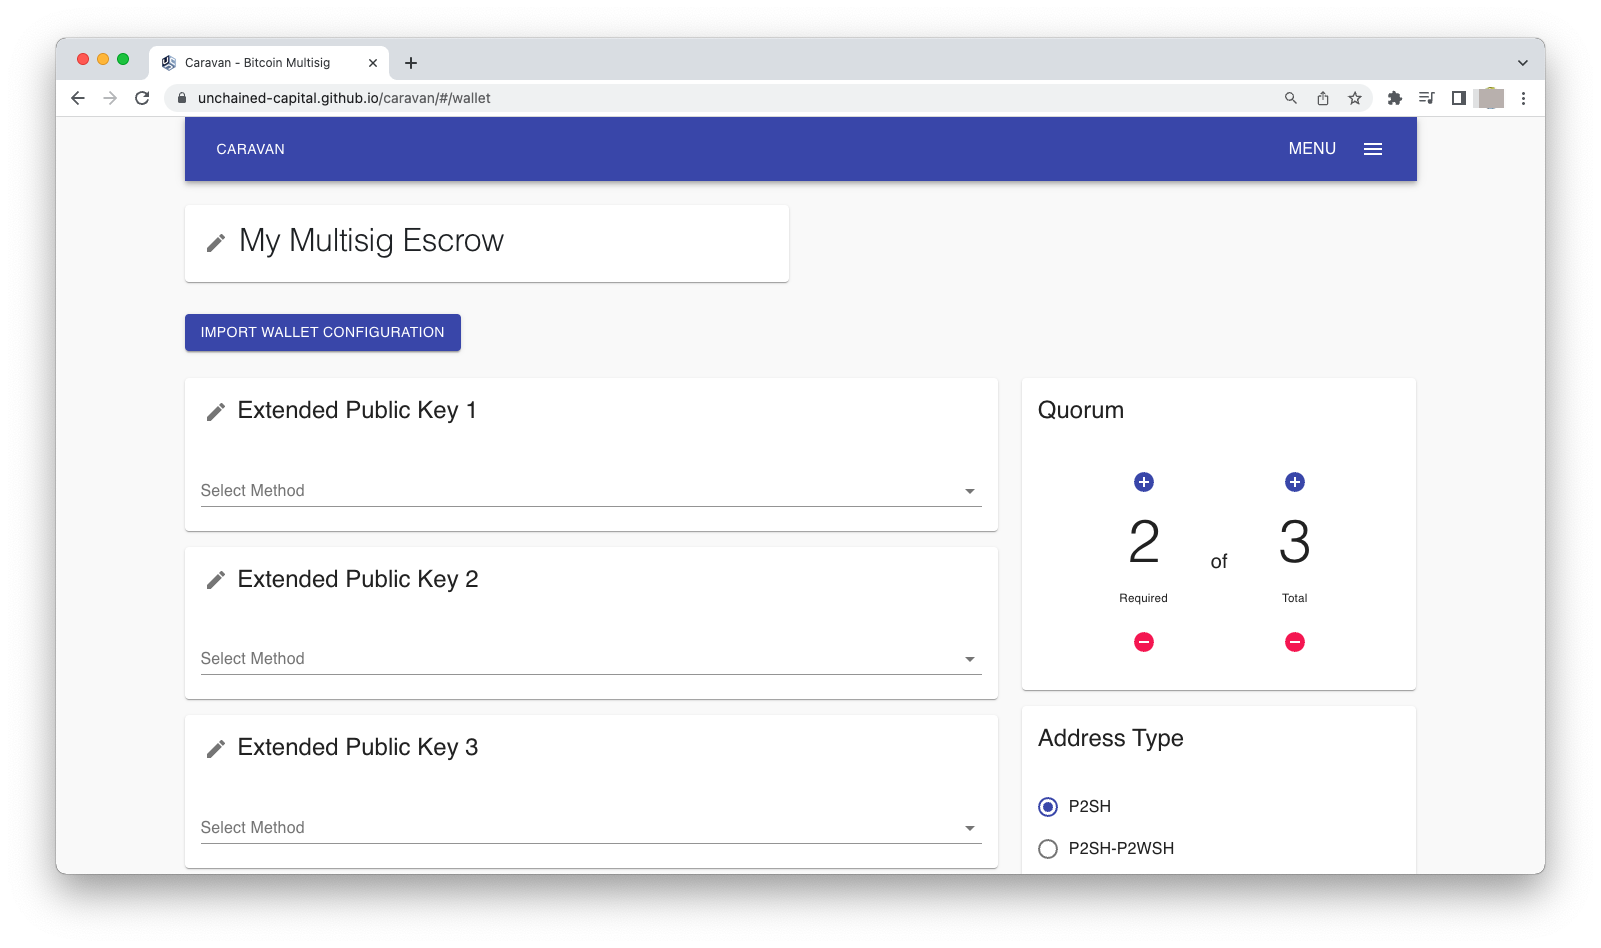
For the rest of the key import process, you can set up a wallet remotely (two or more escrow participants are in different physical locations), or you can set up the wallet locally (all three participants are in the same physical location). Many escrow situations will likely require remote setup, but local setup removes many steps and can simplify the process, if possible for your situation.
If you’re setting up the multisig wallet remotely, each of the two counterparties involved in the transaction must import the extended public key from their device on the Wallet page and digitally send it to the intermediary to construct the wallet.
Following these steps will allow the intermediary to construct the wallet and create the address needed to deposit funds in the next step.
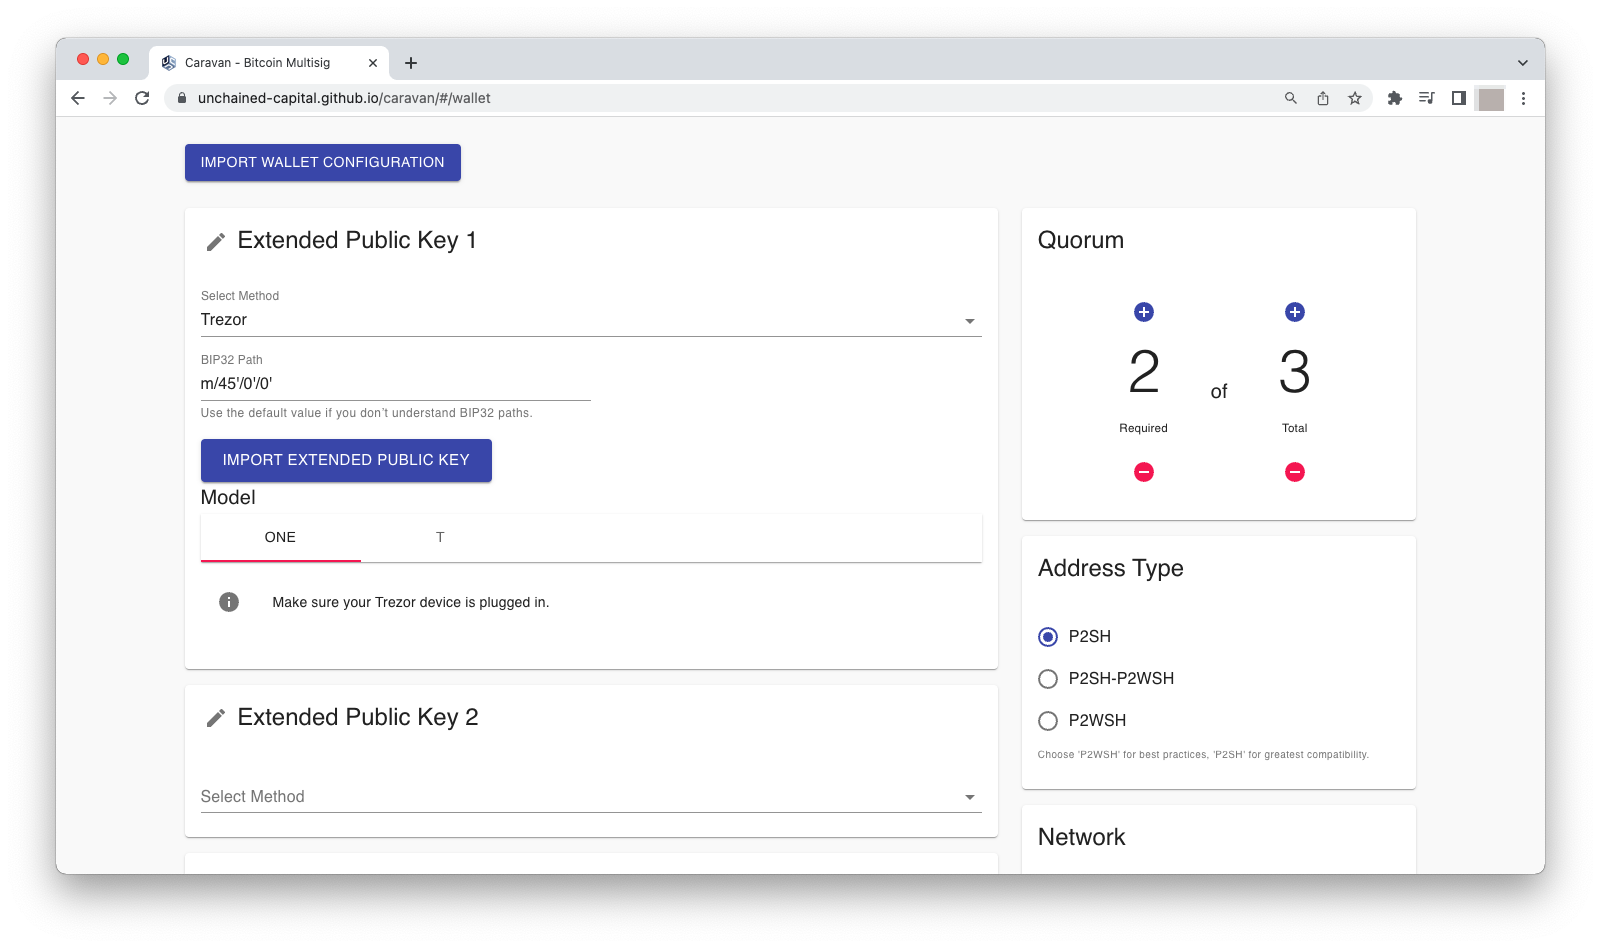
Both counterparties should open Caravan on their own desktop machines and follow the below steps:
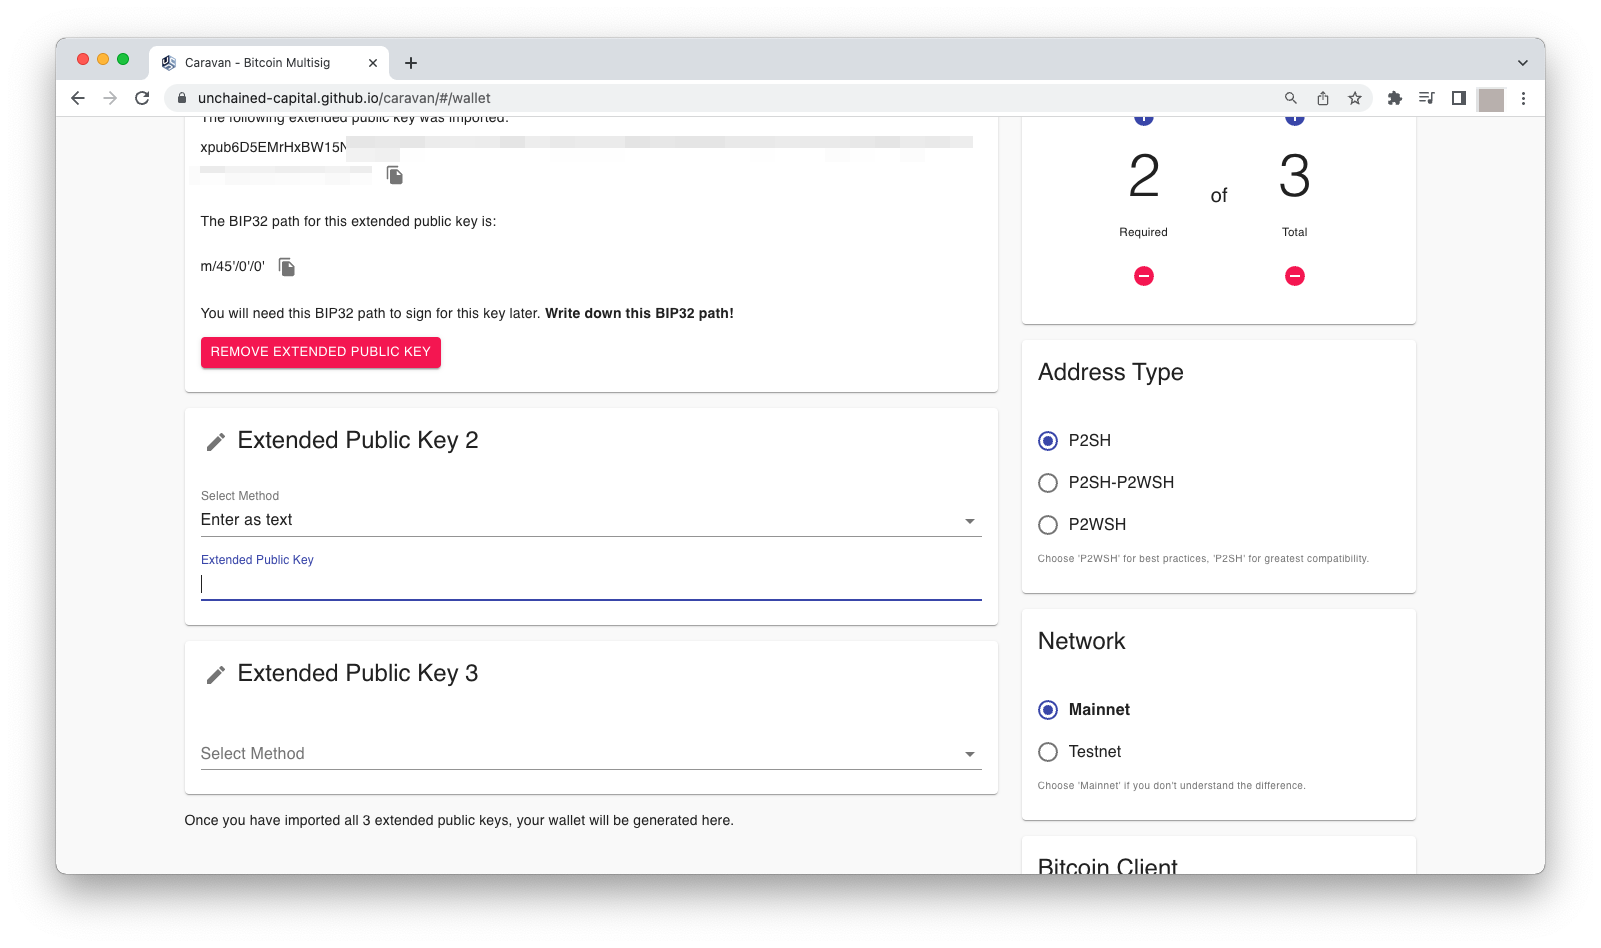
The intermediary constructing the wallet in Caravan should now have two Xpubs shared with them by the counterparties to the transaction.
The intermediary should now follow the below instructions to import their own Xpub from their personal device. Then, they should then manually paste in the Xpubs provided for each of the two keys that were imported by the two counterparties remotely:
After you paste in the third Xpub, Caravan will immediately show you a summary of the wallet construction with all three keys. Confirm the keys are correct and see below for how to download and distribute wallet details before moving on to the next step.
note: Skip these steps and go immediately to download your config file if you chose Option A.
If you’re setting up the multisig escrow wallet with all three parties in person, simply follow the below steps to import the three necessary keys to construct the wallet.
After you paste in the third Xpub, Caravan will immediately show you a summary of the wallet construction with all three keys. Confirm the keys are correct and see below for how to download and distribute wallet details before moving on to the next step.
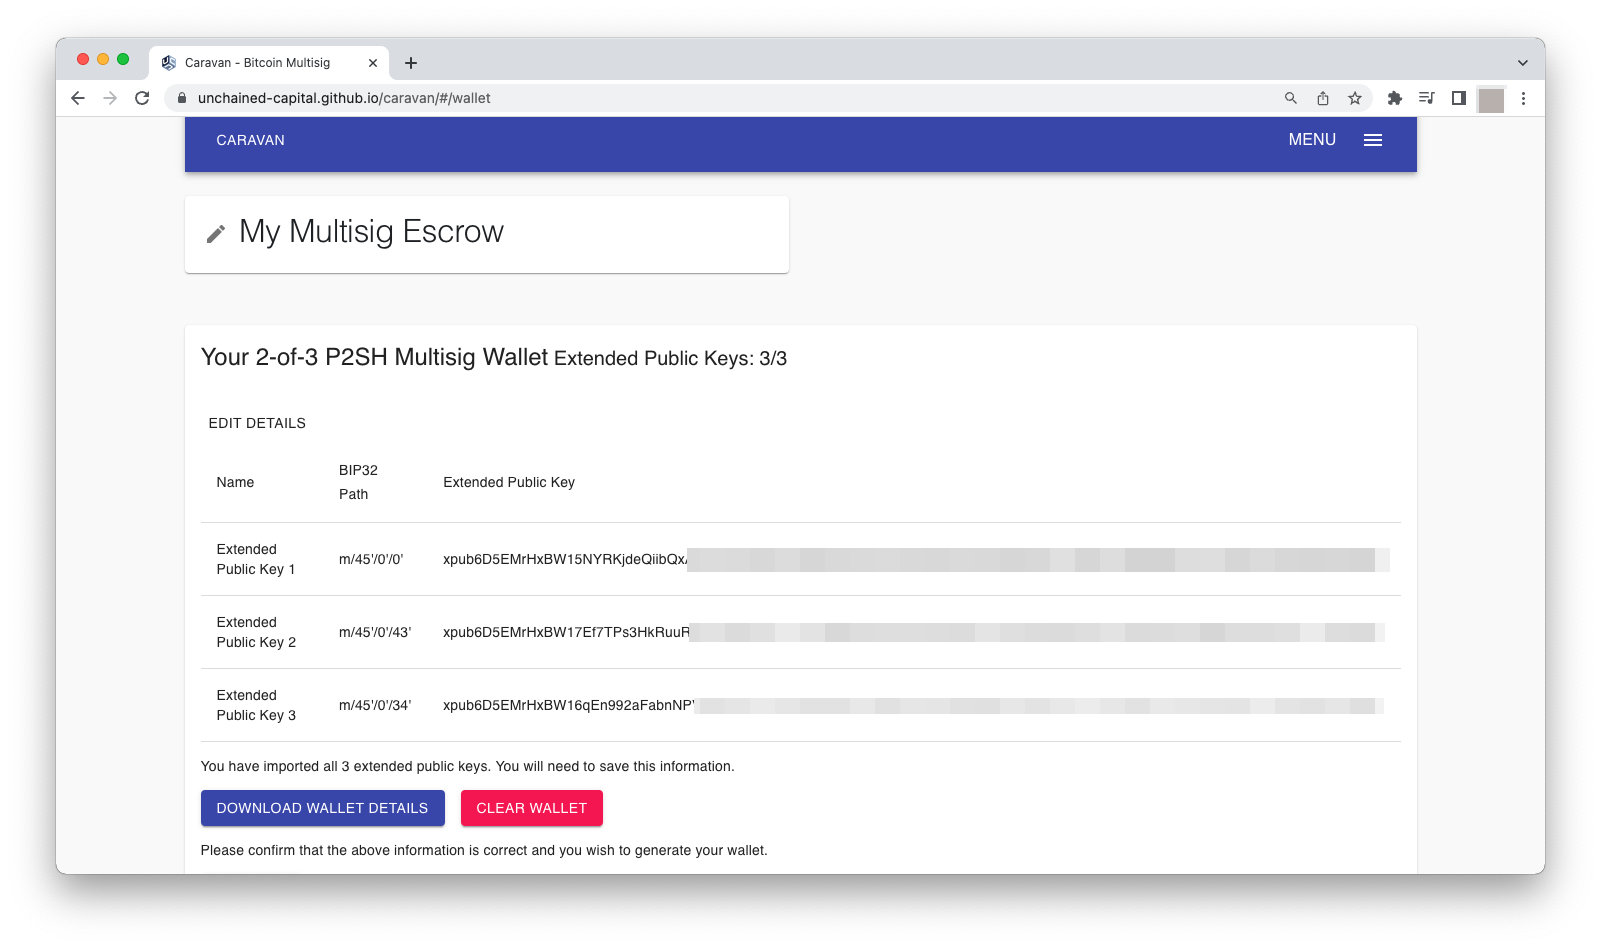
Before proceeding, you need to download your multisig wallet config file. You can think of this file like the treasure map that helps you reconstruct your multisig wallet in the future. Without the config file, you’ll need to repeat the setup process above—with all three keys imported in the correct order—to reconstruct your wallet and send funds.
To save time in the next steps and ensure you don’t make mistakes later, follow these steps to download and distribute your multisig config file:
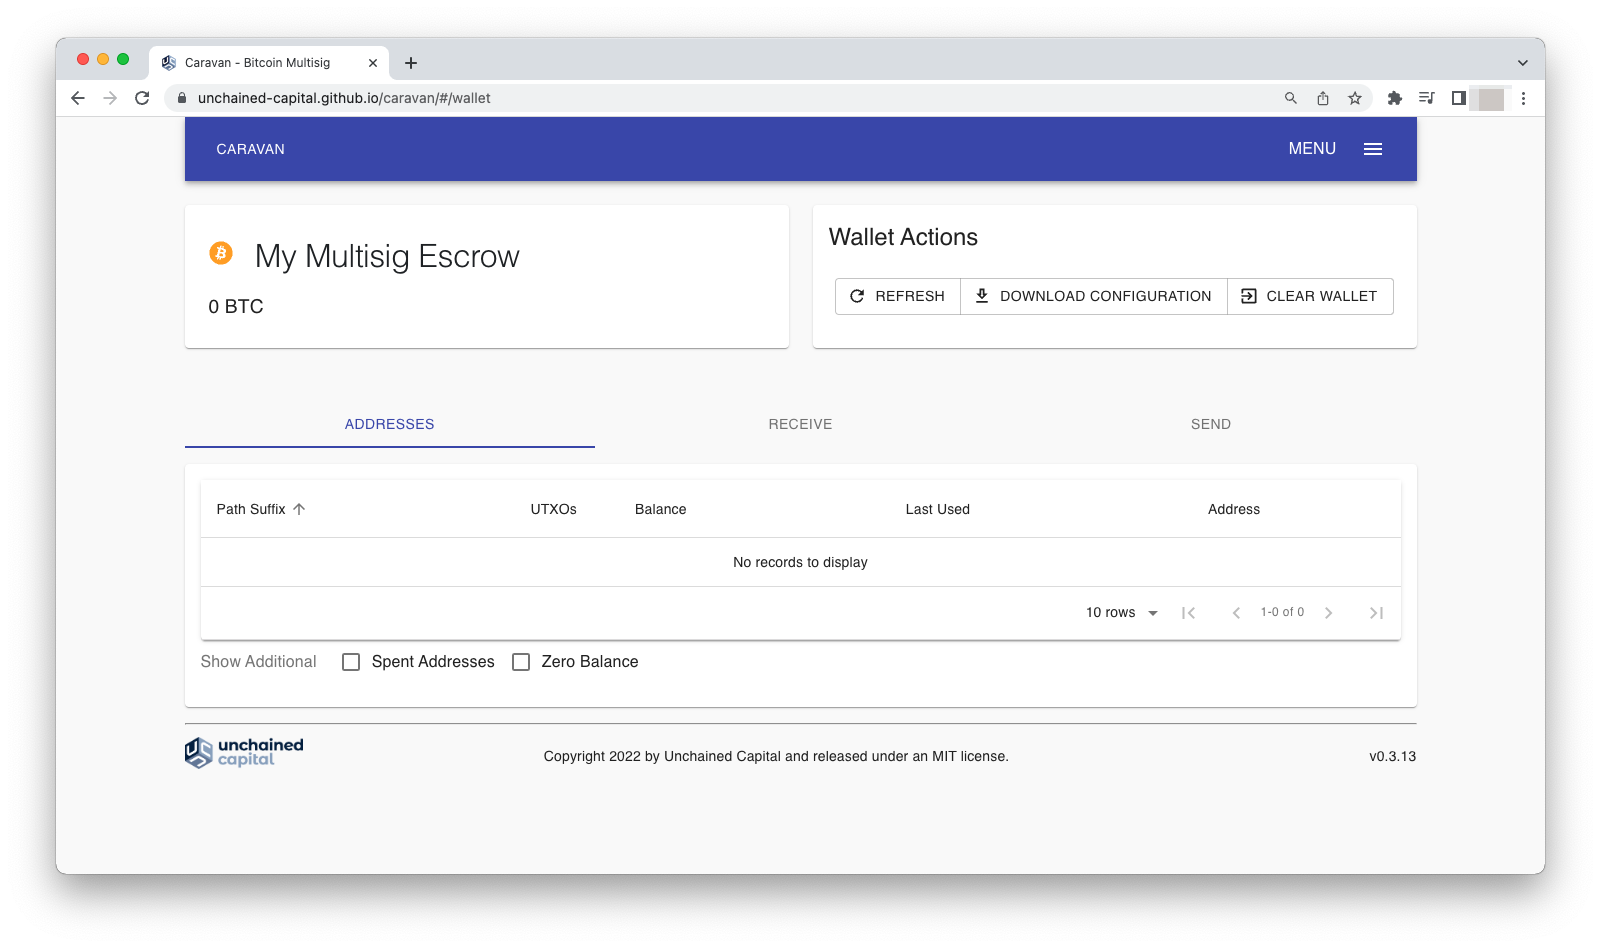
Your wallet is now created and Caravan takes you to a new screen where you can begin using it.
After the wallet is properly constructed you’ll be presented with a screen that shows an overview of the wallet: its balances, addresses, and more.
To deposit funds in your new multisig wallet, the intermediary in charge of constructing the wallet should follow these steps to generate and send the wallet’s deposit address to the buyer:
note: If you will be using this escrow setup for multiple transactions, you can click the Next Address box on the lower left to generate a new receiving address. This will help improve privacy.
 Buyer sends funds
The next step is for the buyer to send funds to the wallet to begin the escrow transaction.
note: You may wish to ensure your multisig wallet is properly constructed by sending a small amount of bitcoin to the address and first ensuring participants can properly disburse these funds before funding the wallet with the full amount for the primary transaction. To do this, follow the rest of the steps in this article with a small amount of bitcoin.
Now, instruct the buyer to send funds:
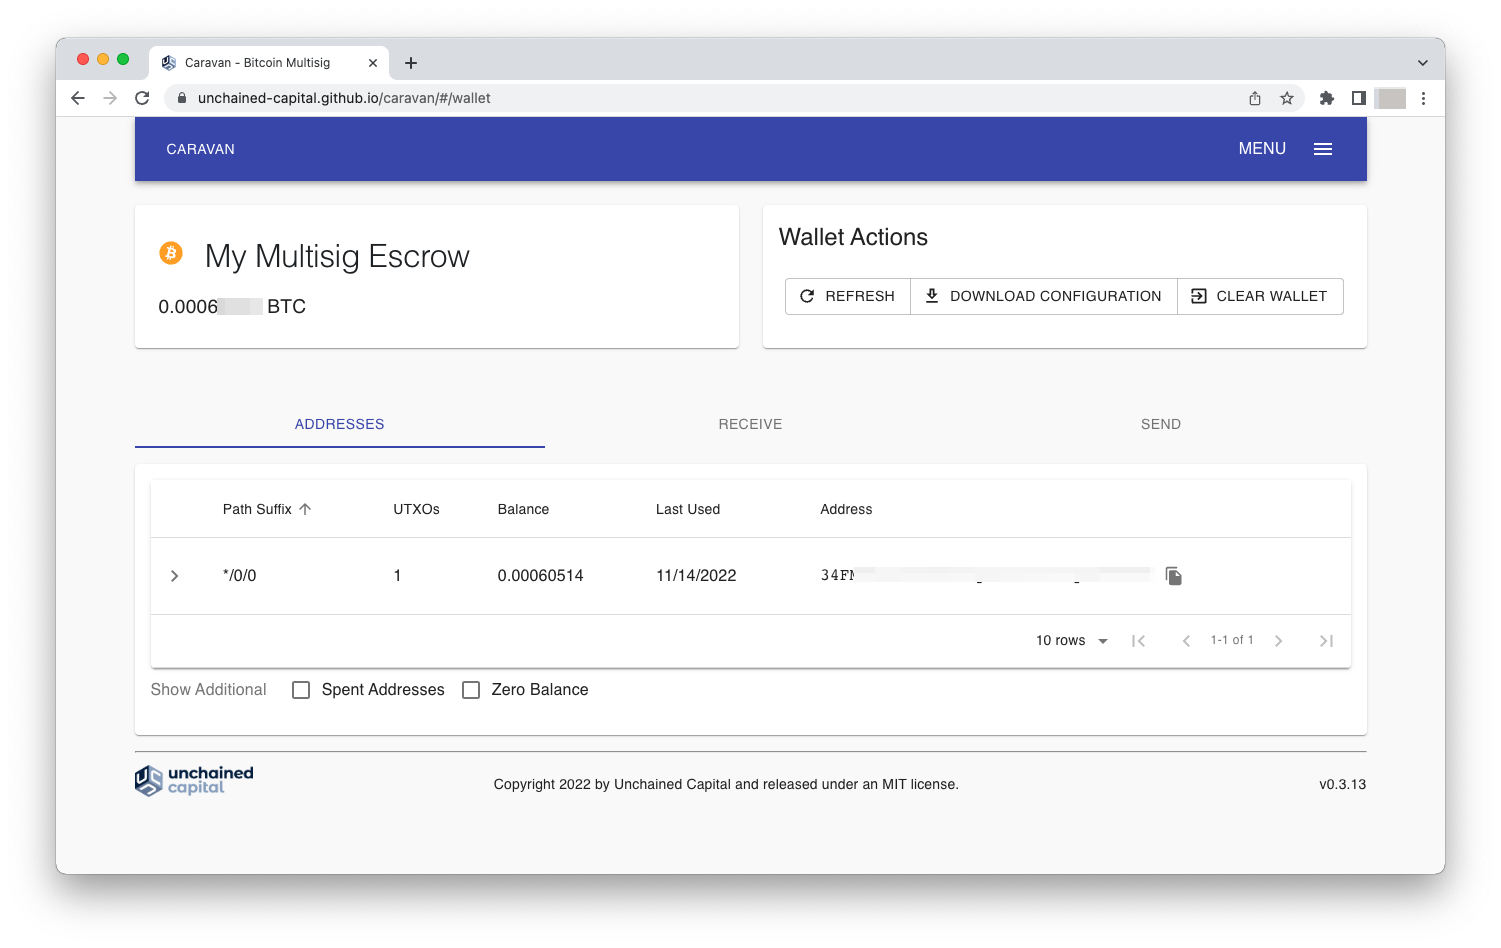
Congrats! Your multisig escrow wallet has been successfully funded. In the next step, we’ll use 2-of-3 keys to sign a transaction to disburse funds to the seller.
 4. Disbursing funds from escrow
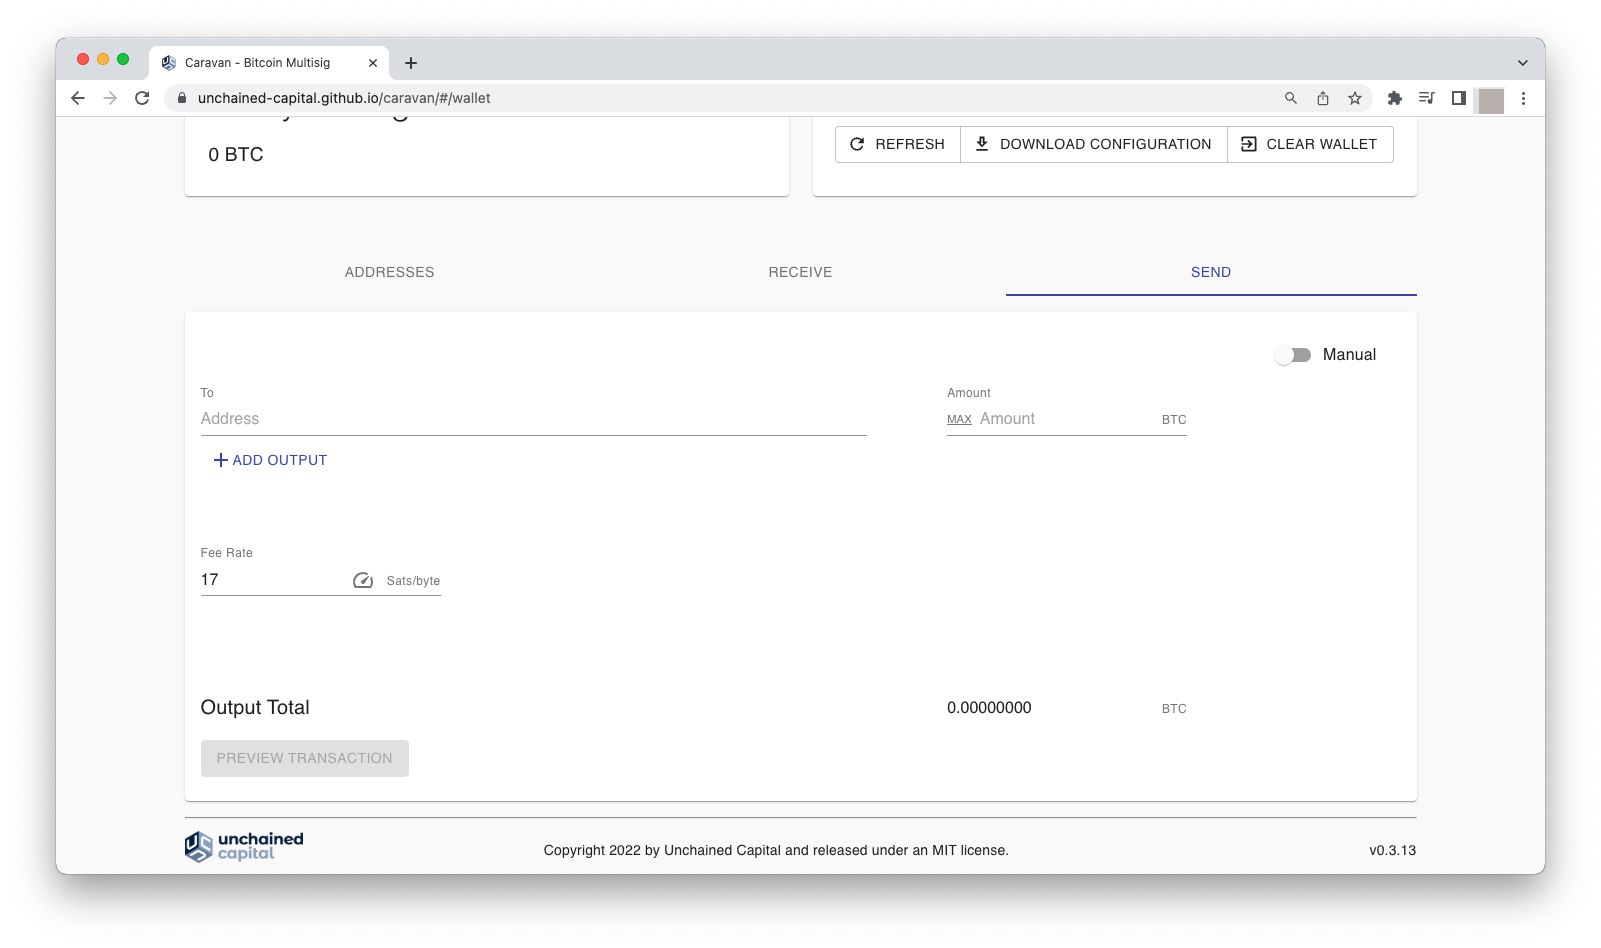
To send funds, begin by clicking on the Send tab. Here you see the following sections:
To disburse bitcoin from your multisig wallet, the intermediary first needs a final settlement address. In this example escrow, the intermediary would collect this when they clear the release of funds. Assuming everything went well, this would mean constructing a transaction that sends funds to the seller’s final bitcoin address.
The seller (or buyer, in the case of a refund) needs to provide you, the intermediary, with a deposit address from their individual wallet using either a separate bitcoin wallet or a separate, standalone address controlled by the key they contributed to the multisig setup (i.e., the seller’s key).
Once you have an address to which you want to finally send bitcoin, keep it on hand for the next steps create the transaction and authorize the spend.
To finalize the disbursement of funds to one or the other party, the intermediary will need to sign with one of the parties to release funds to the seller, or in the case of a dispute, sign with one of the parties to refund the buyer. Either way, the basic steps for signing a transaction to disburse funds are the same.
The intermediary must now begin authoring the transaction from their machine. Follow these steps:
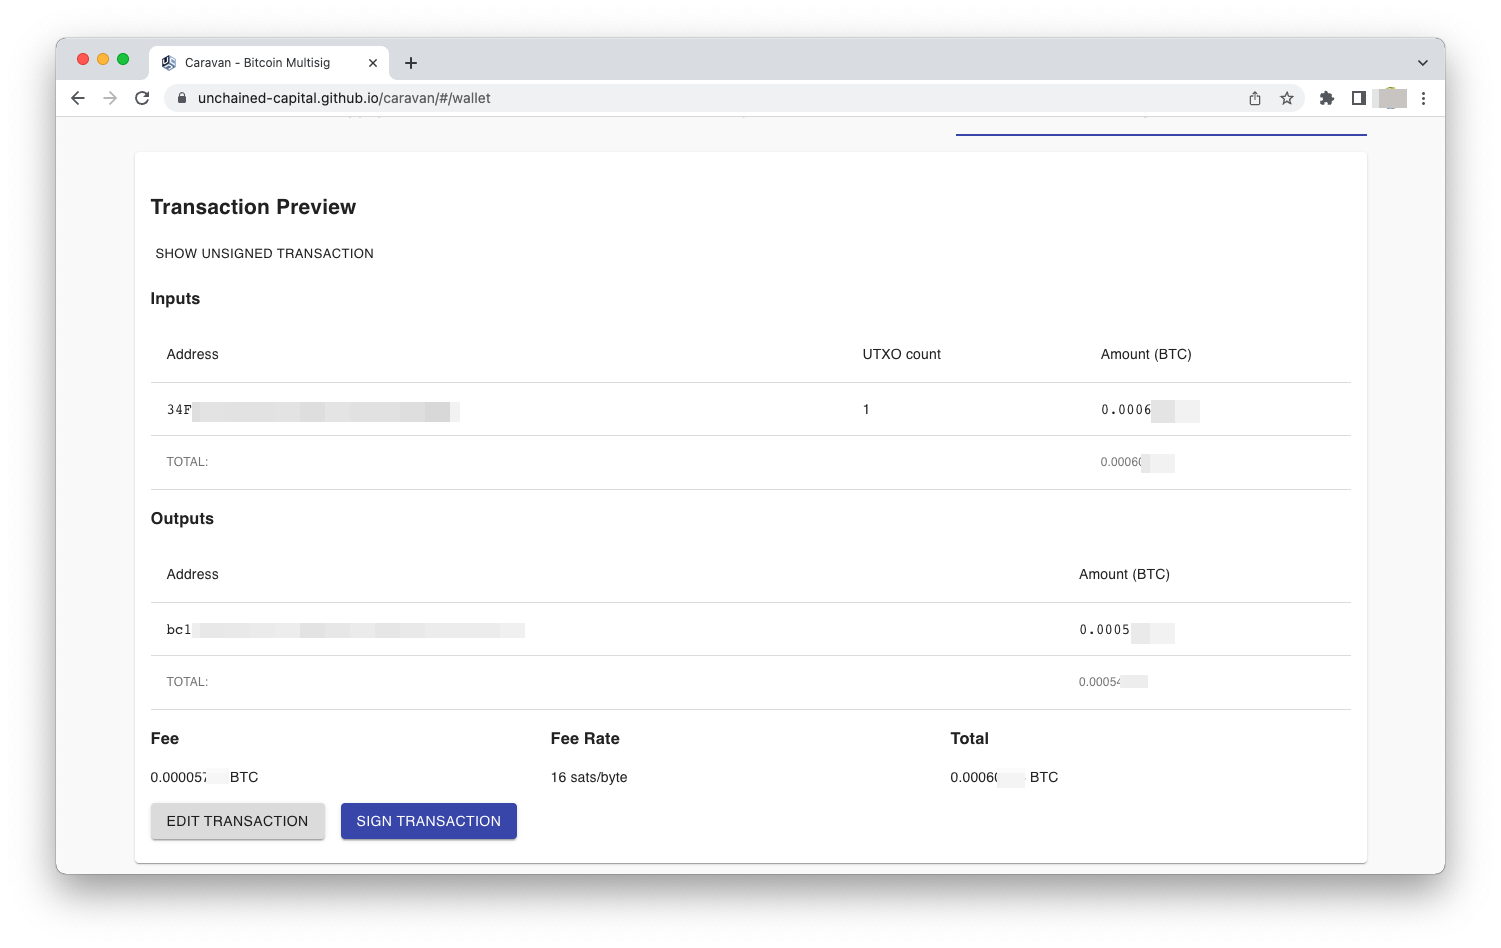
note: It is best to choose a mid-range fee rate to be sure your transaction goes through without too much delay and avoids getting stuck in mempool. Because multisig transactions contain more data, it is normal for fees to be higher than when sending a singlesig transaction. Read more about bitcoin transaction fees.
If the intermediary and the second signer are physically separate from one another, the counterparty to the transaction will need to enter the exact same above information into their own Caravan interface, posing as if they are going to sign the transaction and broadcast it themselves.
This step will provide the intermediary with the necessary secret signature data to be able to finalize and broadcast the transaction in the final step.
The seller (or the buyer, in the case of a refund), must follow these steps to collect their signature, providing it to the intermediary:
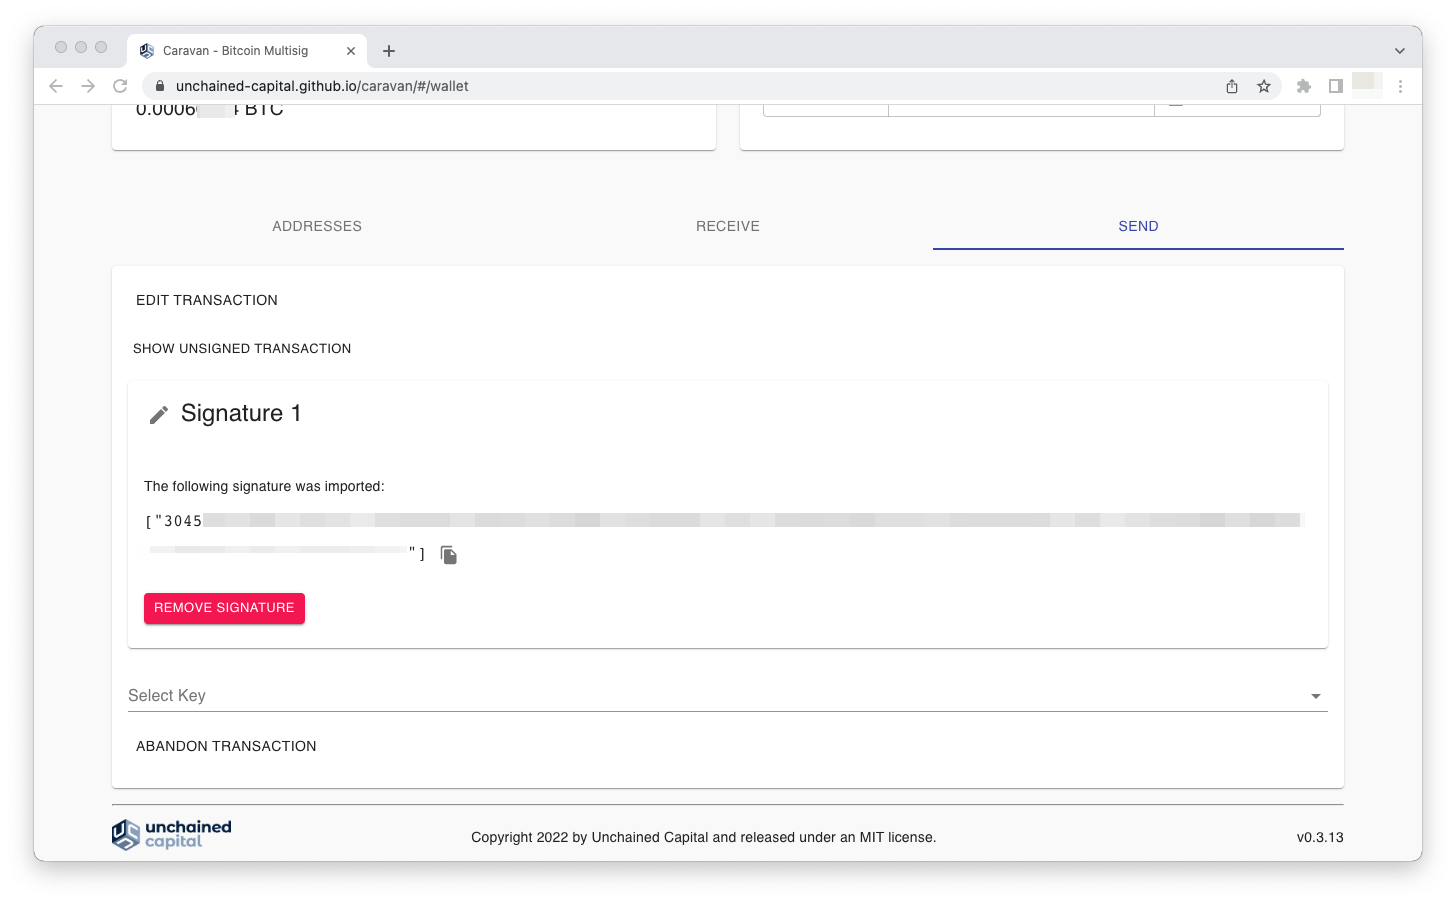
The intermediary should follow the steps below to sign the transaction using the signature provided by the seller (or the buyer in the case of a refund) and the signature by their own key:
Caravan will then tell you a signature has been imported and displays the details for two signatures: the one you manually imported (as sent by the buyer or seller), and the second signature provided by your hardware wallet.
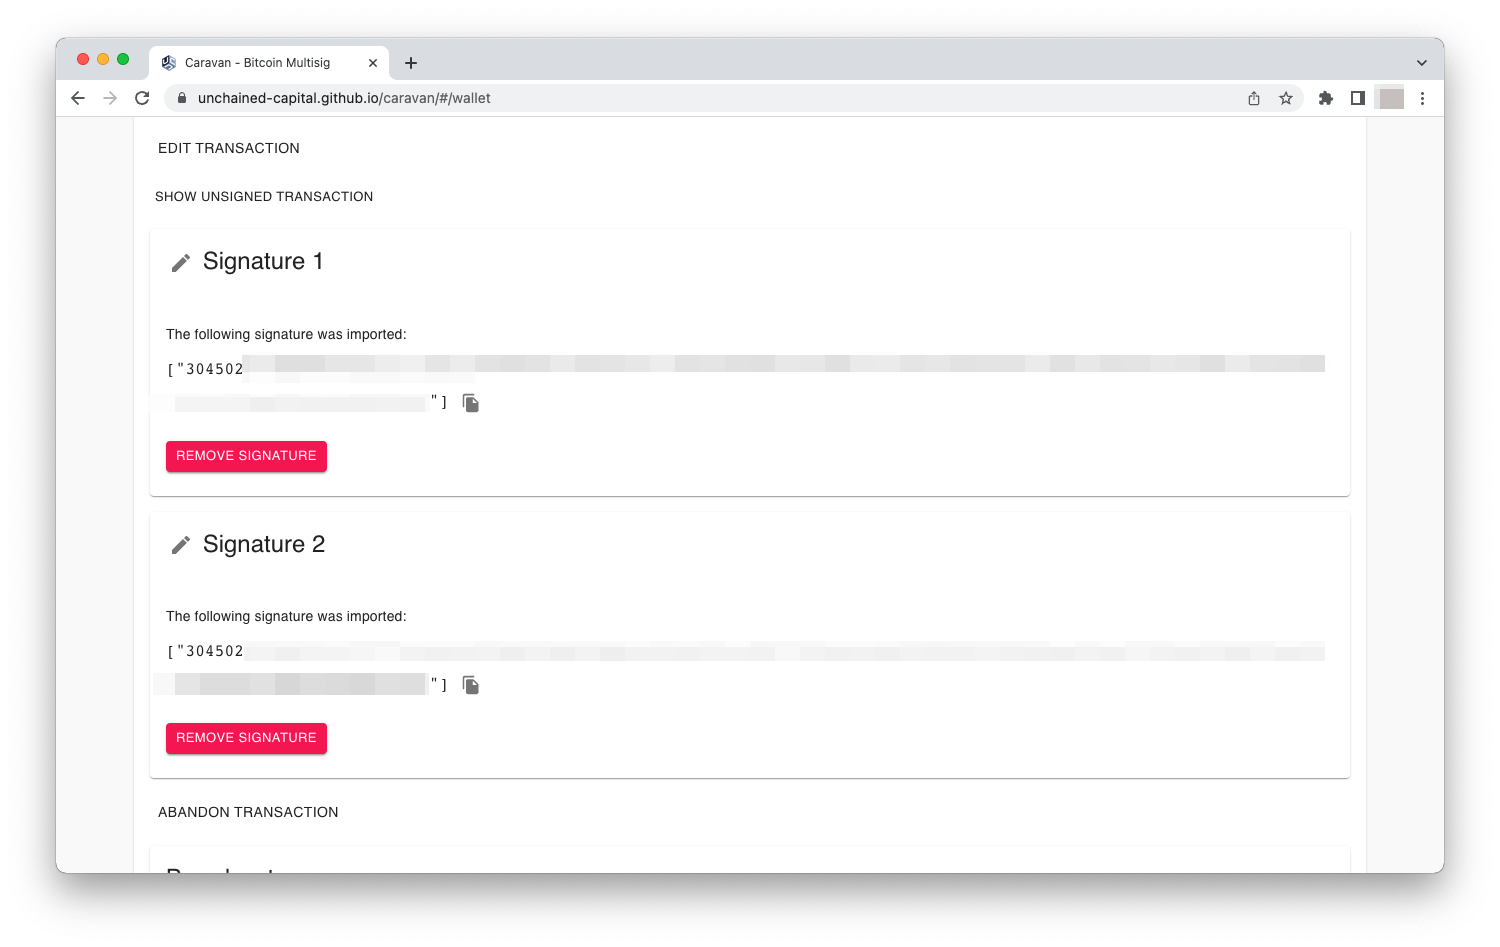 Now that the two required keys have been successfully signed, skip to the next section—the transaction is ready to be broadcast.
If the intermediary and the second keyholder (either the buyer or the seller) are in the same physical location, they can simply navigate to the transaction signing page and provide the required signatures.
One at a time, each needs to:
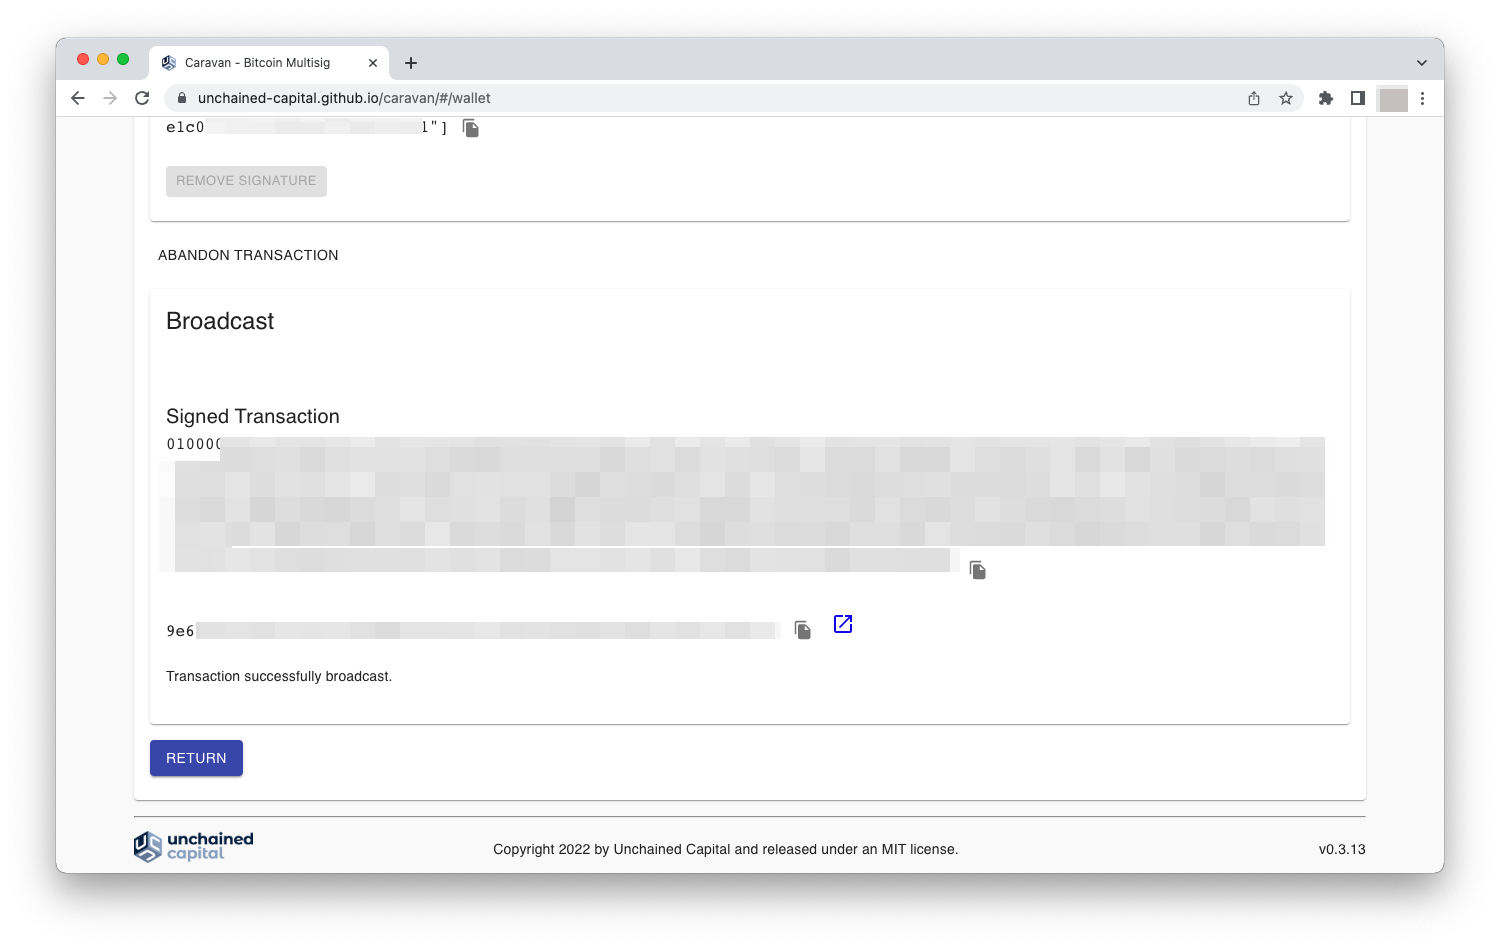
Now that the two required keys have been successfully signed, the transaction is ready to be broadcast.
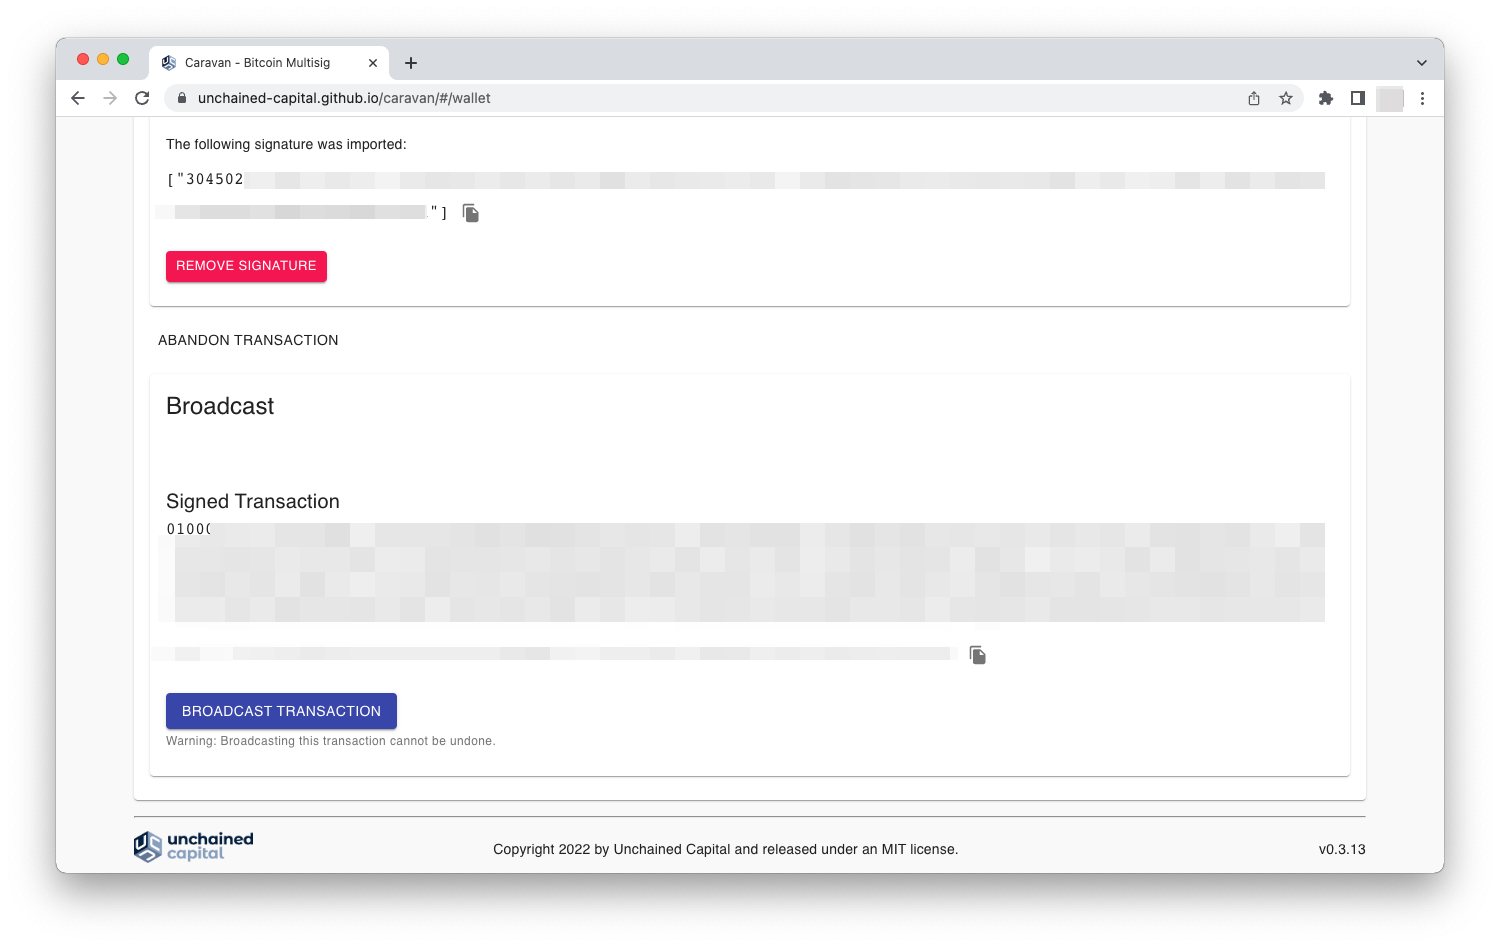 Caravan now tells you your transaction has been successfully broadcast and displays the transaction ID with an external link to Blockstream Explorer and a button for you to return to the main screen.
 Congratulations, your escrow funds have been fully settled. You can now view your updated balance and your addresses—including details about the address you just spent from.
To see whether any bitcoin transactions sent or received is confirmed on the blockchain, click the Address tab. Here you will see a column labeled Last Used. If you see Pending displayed under this column, the transaction is not yet confirmed.
You can check the status of the transaction using a tool like Blockstream Explorer or Mempool.space. Simply copy and paste the transaction ID or click the external link provided in Caravan.
If after clearing your browser, you would like to access your wallet again, you can simply import the config file that you downloaded earlier. Anyone with access to this file can always generate new addresses and send bitcoin to this escrow wallet, but you’ll always need at least 2-of-3 signatures to spend those funds.
Many of bitcoin’s staunchest critics have expressed doubt about its 21 million cap, but perhaps the most mindless criticism relates…
,When Satoshi Nakamoto created bitcoin, he established in its code a fixed number of bitcoin that will ever exist. Since…
Originally published in Parker’s dedicated Gradually, Then Suddenly publication. Bitcoin is often described as a hedge, or more specifically, a…